Installation and maintenance instructions
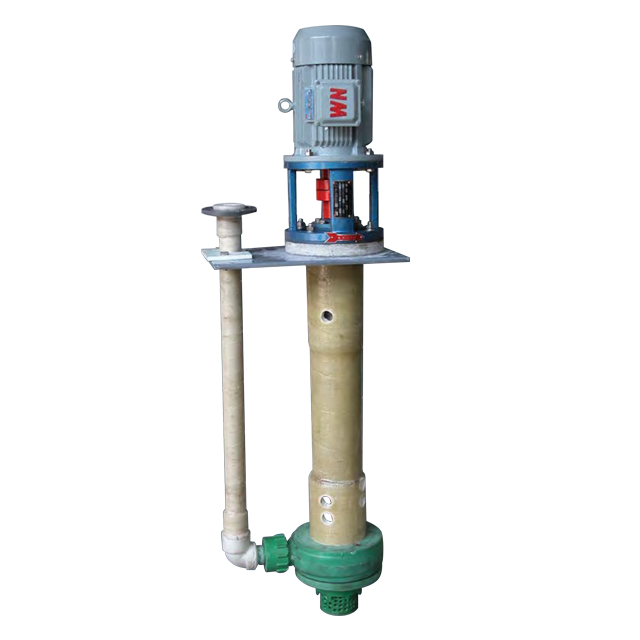
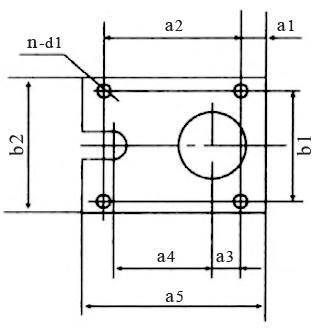
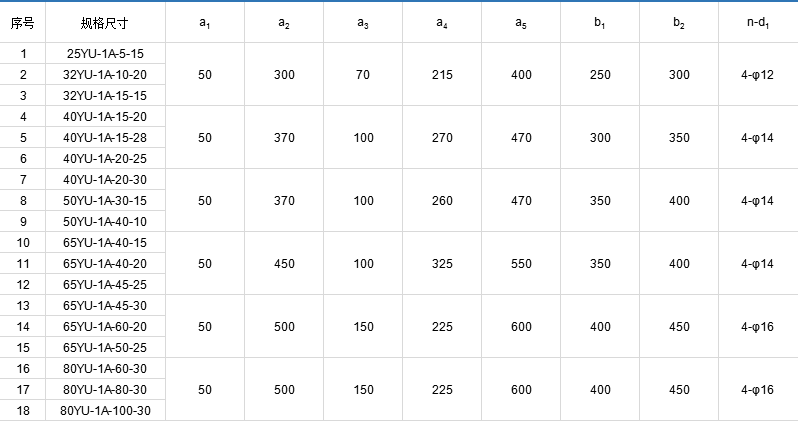
1. Installation: The pump is vertically fixed to a desired position, connect the outlet line.
2. Start: power point start to see the motor rotation direction arrow on the pump are the same, such as inconsistency should be re-wiring of the steering motor; motor is running correctly and then slowly open the outlet valve to the desired state.
3. Parking: Close the outlet valve, then stop the power supply.
4. Removal:
a. Remove the first infusion tube 7, unscrew the filter cover 20 (between the filter and the pump cover to cover right-hand thread), and then unscrew the pump cover 21 (available on two knockout hole pump cover during disassembly) , followed by removing fight cap assembly 19, the impeller 17, and sleeve 15 (fight between the cap and the shaft left hand thread);
b. Unscrew the pump body 13 (right hand thread), unscrew the cap 12 fight (right hand thread), remove the K-ring 14.
5. Assembly: Once you've worn or damaged parts replaced by the reverse order of removal pump assembled, the assembly should pay special attention to various parts of the gasket is installed. Do not more or less than.
6. Check: assembled, the hand plate fixed coupling application to see if flexible operation, such as rotation is not flexible or unusual noise, jamming or other abnormal conditions, should be re-split pump inspection, cleaning foreign objects, eliminate noise, increase or decrease impeller pad 16 to adjust the gap between the impeller and pump body, this should ensure that the gap between (1 ~ 2) mm, by increasing or decreasing the pump cover pad 18 to adjust the gap between the impeller and the pump cover, the gap should ensure that ( 1 ~ 2) mm, after installation, and then the coupling plate, and so forth until the flexible operation before electrical connection, press start program the pump into operation.
7. Note: Since most of the pump is made of plastic, it can not be a strong impact and twisting to avoid unnecessary damage.

